How to Weave in Ends Knitting project
Every knitting project inevitably leads us to an important final step – weaving in ends. This technique helps you secure your yarn tails and give your work a polished appearance. Let’s understand the right way to weave in ends and transform your knitting project into a masterpiece.
Why Weaving in Ends Matters in Knitting
How to Weave in Ends Knitting project, a time-consuming but crucial task, is securing the yarn ends into the knitted fabric. It’s a step that prevents your work from unraveling, ensuring the durability and longevity of your masterpiece. This process also helps to maintain the aesthetic integrity of your stitch pattern, whether it’s a garter stitch, stocking stitch, seed stitch, or reverse stocking stitch.
Choosing the Right Tools for Weaving
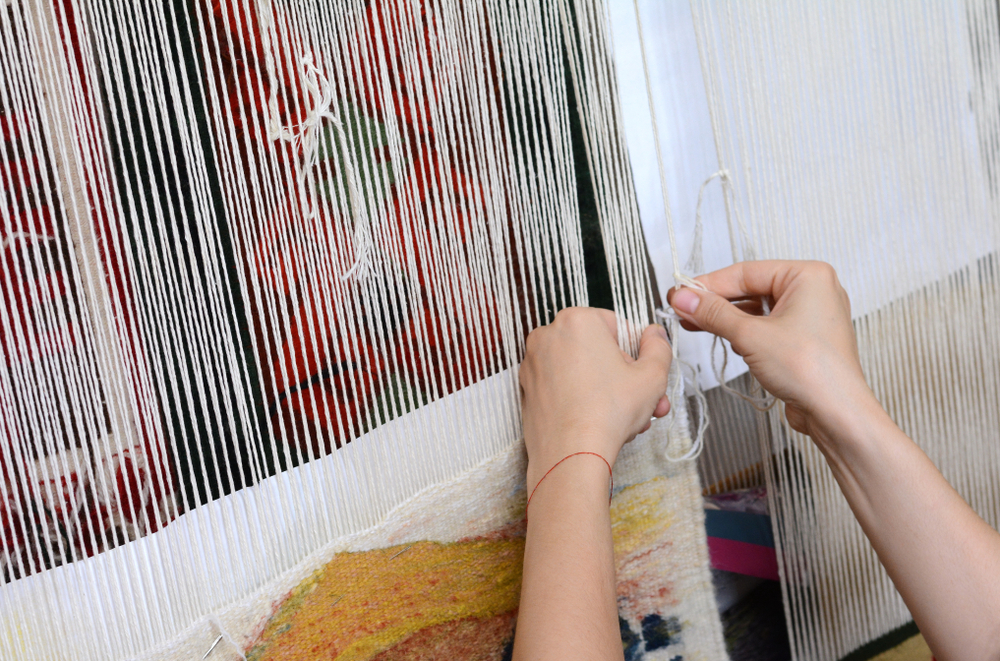
The right tools can make the process of weaving in ends more efficient. A tapestry needle, especially one with a bent tip, is often preferred over a yarn needle due to its versatility in handling yarns of different thickness, from cotton yarn to bulky yarns. They are also perfect for handling various types of knitting projects, including chunky or striped blankets.
Step by Step Guide: How to Weave in Ends in Knitting
Ready to start weaving? Let’s take a step-by-step look at how to weave in ends knitting, ensuring your hard work doesn’t unravel.
- Prepare Your Yarn and Needle: Thread your tapestry needles with the yarn tail. For thicker or chunky yarns, you might want to split the yarn to avoid bulky sections in your finished knitting.
- Identifying Your Stitch Type: Identify the stitch pattern of your project. This could be a garter stitch, stocking stitch, or perhaps a more complex pattern. Understanding the pattern is essential as it will guide where and how you weave your yarn ends.
- Weaving in Stocking Stitch and Reverse Stocking Stitch: In a stocking stitch or reverse stocking stitch, you will weave in ends by following the path of the yarn through the knit and purl stitches. For the knit stitch, follow the path of the yarn under the knit stitches and purl bump on the wrong side of your work. You weave on the wrong side following the purl bumps for the purl stitch.
- Weaving in Garter Stitch and Seed Stitch: In a garter stitch, follow the path of the yarn, weaving in and out of the ridges formed by the knit stitches on the wrong side. The process can be a little more complex in a seed stitch, but essentially, you will be following the bumps, similar to the garter stitch.
- Weaving in Ends with Duplicate Stitch: A favorite method among knitters, weaving with a duplicate stitch involves tracing the yarn over the stitches on the wrong side of your project. It’s a great way to weave in ends, particularly for color block or multi-colored projects.

Color Changes and Weaving: Creating a Seamless Transition
When it comes to knitting with multiple yarn colors or incorporating stripes into a blanket, there’s an art to making those color transitions look seamless. A useful technique is to weave in the old yarn and new yarn tails in their own color sections to keep the weave unnoticeable. This approach also helps maintain the pattern consistency, whether it’s a garter stitch or a stocking stitch.
Understanding Different Yarns and Their Impact on Weaving
It’s important to recognize that not all yarns are created equal when it comes to weaving in ends. Some, like cotton yarn, may require a slightly different approach than more textured or bulky yarns. Additionally, choosing a new ball or skein of yarn with a similar texture can aid in maintaining a consistent stitch pattern throughout your knitting project.
Tips for Weaving in Ends on Different Stitch Patterns
Different stitch patterns can present unique challenges when it’s time to weave in ends. Here are some tips to help:
- Stocking Stitch and Reverse Stocking Stitch: Keep your weaving to the wrong side of the work. Try to mirror the route of the existing yarn, going in and out of the knit and purl stitches.
- Garter Stitch: Weaving is often easier here, as the textured nature of this stitch hides yarn ends well. Simply weave in and out of the ridges on the wrong side.
- Seed Stitch: While a bit trickier due to the alternating knit and purl stitches, you can use a similar approach as in garter stitch by weaving through the textured bumps.
Common Challenges in Weaving and How to Overcome Them
While weaving in ends can be time-consuming, a few common challenges can make it more daunting. Here’s how to overcome them:
- Avoiding Loose Stitches: This often happens when the yarn tail is not secured well during weaving. To avoid this, ensure the yarn is woven firmly without distorting the fabric tension.
- Dealing with Short Yarn Tails: If your yarn tail is too short, try using a smaller needle or a needle with a bent tip, which can be easier to maneuver.
- Preventing Ends from Poking Out: When you’ve finished weaving, trim the yarn close to the surface of the fabric, but not too close. Leave a tiny tail that will get absorbed into the fabric with use and wash.

Weaving in Ends with Bulky Yarns: Tips and Tricks
Bulky yarns pose a unique challenge when it comes to weaving in ends. Their thickness can often lead to unwanted lumps or bumps in the finished fabric. Here’s how you can deal with this:
- Split the Yarn: Consider splitting the bulky yarn into two strands, weaving each strand in a different direction. This reduces bulkiness and ensures a smoother finish.
- Stretch it Out: After weaving, gently stretch the knitted fabric to distribute the bulk evenly. This helps the woven end to blend into the fabric seamlessly.
Weaving in Ends on a Striped Blanket: A Colorful Challenge
Weaving in ends on a striped blanket can be quite a task, especially if the color changes frequently. Here are some tips to help:
- Weave in the Same Color Section: When you’re changing colors, always weave the yarn ends into the same color section. This makes the woven ends less noticeable.
- Use the Duplicate Stitch Method: For color block or striped patterns, the duplicate stitch method of weaving can be quite effective. This involves following the path of the existing stitches, making the added yarn less noticeable.
A Favorite Method: The Felted Join
While not suitable for all yarns, the felted join is a favorite method among many knitters, especially when working with wool. It involves felting two yarn tails together to create a seamless join that eliminates the need for weaving in ends. However, this technique works best with feltable wool and may not be suitable for cotton yarn or synthetic yarns.
The Art of Weaving in Ends in Seed Stitch
With its textured and visually appealing finish, the seed stitch can be a little tricky when it comes to weaving in ends.
- Follow the Purl Bumps: Use the tapestry needle to trace the path of the yarn, weaving in and out of the purl bumps. Remember to keep your weaving on the wrong side to maintain the pattern’s visual integrity.
- Use Same Color Yarn: If you’re working with different yarn colors, ensure you’re weaving the yarn end in the same color section to keep the weave invisible.
The Importance of Weaving in Ends as You Go
While leaving all the weaving until the end can be tempting, this can make the task more daunting and time-consuming. Weaving in ends as you go not only breaks up the task but also helps to prevent any potential unraveling as you continue to work on your project.
Casting Off and Weaving: The Perfect Finish
Casting off is another point in your knitting project where weaving in ends comes into play. When you’ve cast off the last stitch, you’ll have one final yarn tail to weave in. Like with other yarn tails, thread this last tail through a tapestry needle and weave it into the fabric, ideally following the path of the stitch pattern for a seamless finish.
Important tips to remember
The Importance of Thread Tension
The tension of your thread plays a significant role in the success of your weaving process. If you pull the yarn tail too tight, you risk puckering your beautiful knitted fabric, and if it’s too loose, the ends may pop out with wear. So, finding that “just right” tension is key. Practice makes perfect!
Two-Tailed Technique
When adding a new color or a new skein to your knitting project, remember the two-tailed technique. Leave enough of a yarn tail for both the old yarn and new yarn so that you can weave them securely into your work. This will also help prevent any loose stitches.
Right Needle for the Right Yarn
While a tapestry needle is a versatile tool in knitting, remember that the needle size and type should be compatible with your yarn. For instance, a needle with a bent tip is often handy for weaving in ends in chunky or textured fabric.
Travel in Different Directions
When weaving in ends, try to go in one direction first, then change to a different direction. This zigzag pattern can help secure your yarn end, especially in high-stress areas like underarms in a knitted sweater or corners of a blanket.
Choose Your Favorite Method
There are different methods to weave in ends, such as the duplicate stitch method and the weaving method. Each has its advantages, depending on the stitch pattern and yarn type. Try out different methods and choose the one you find the most reliable and easy to do.
Be Mindful of the Reverse Side
Most of the weaving in ends happens on the wrong or reverse side of the work. But do remember to check how the right side looks after weaving. There should be no visible bumps or changes in the fabric tension that could affect the final look of your project.
Handle Your Little Tails Well
Once you’re done weaving, you’ll be left with a little tail. Don’t be tempted to trim it too close to the fabric. Leaving a tiny bit will allow the yarn to retract into the fabric over time, making it less likely to pop out.
Cast On and Cast Off with Care
How to Weave in Ends Knitting project begins with your cast on and ends with your cast off. Ensuring these are secure can greatly reduce the chance of your work unraveling. Remember to leave a long enough tail when you start knitting and secure your final stitch well when you’ve finished knitting.
Embrace the Process, Perfect the Outcome
How to Weave in Ends Knitting is an essential part of knitting to ensure your projects don’t unravel and give your work a clean, finished look. Whether you’re working on a garter stitch scarf or a color block blanket, mastering the art of weaving in ends can take your knitting to the next level. Remember, practice makes perfect, and each project is an opportunity to refine your skills and create something truly remarkable. Happy knitting!
