How to Increase a Stitch in Knitting
As you dive into the world of knitting, you’ll soon realize that knowing how to increase a stitch in knitting is crucial for creating interesting knitted shapes and expanding your knitting repertoire. You can skillfully manipulate your knitted fabric with various techniques and bring intricate knitting patterns to life. This comprehensive guide will explore various methods to increase knit stitches and enhance your knitting skills.

The Basic Knit Front and Back (KFB) Increase
The knit front and back (KFB) increase is a beginner-friendly method that involves knitting into the same stitch twice. To perform this increase in knitting, insert your right needle into the next stitch on your left hand needle as if to knit.
Wrap the yarn around the right needle and pull it through to create a new stitch. However, do not slide the original stitch off the left needle yet. Instead, insert the right needle into the back loop of the same stitch and knit once more. Now you can slide the old stitch off the left needle, leaving you with two stitches where there was once just one.
Exploring the Bar Increase (Make One or M1) Method
The bar increase, commonly known as “make one” or “M1,” is a versatile increase method that works well in various knitting patterns, such as lace and stockinette stitch.
This technique involves lifting the running thread between two stitches and knitting into it, creating an extra stitch. Depending on how you knit into the lifted loop, you can achieve different effects, such as a left or right-leaning increase.
Left Lifted Increase (LLI) and Right Lifted Increase (RLI)
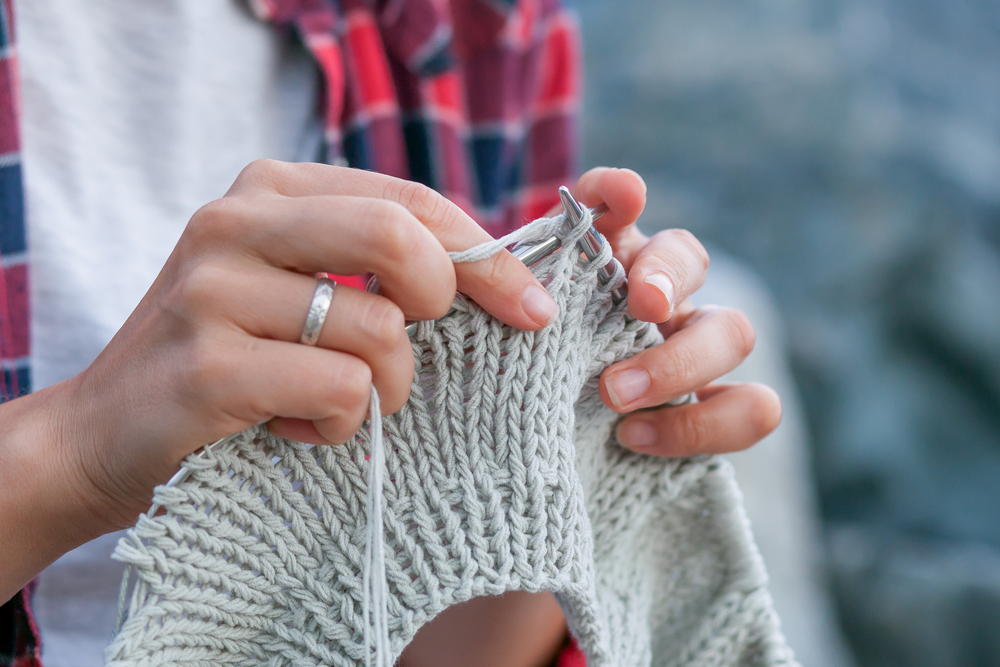
Lifted increases are a popular choice for knitting patterns that require invisible increases. Both left lifted increase (LLI) and right lifted increase (RLI) methods involve working into a stitch from the previous row, resulting in a virtually undetectable extra stitch.
To perform an LLI, insert the left needle from front to back under the left loop of the stitch below the next stitch on the left needle. Then, knit into the lifted loop with the right needle. For an RLI, insert the left needle from back to front into the right loop of the stitch below the last stitch on the right needle, and knit into it.
Backward Loop Increase: A Simple Solution for Knitting Beginners
The backward loop increase, also known as the loop method, is perfect for beginner knitters. This technique involves making a simple loop on the right hand needle with the working yarn, adding a new stitch without working into existing stitches.
While this method is easy to execute, it may produce a small hole in the knitted fabric, making it less suitable for some knitting patterns.
Purl Stitch Knitting Increases: Adding Stitches on the Purl Side
Just like the knit stitch, you can also increase stitches on the purl side of your work. The most common purl increases are purl front and back (PFB) and purling into the bar increase (M1P). These methods mirror their knit counterparts, allowing you to add stitches seamlessly to stocking stitch and garter stitch patterns.
Balancing Your Stitches: Decreasing and Maintaining Stitch Count
While increasing stitches is essential, knowing how to decrease stitches is equally important to maintain the desired number of stitches in your work.
Techniques such as knit two together (K2tog) and slip, slip, knit (SSK) help you decrease stitches while maintaining the overall knitting pattern.
Tips for Choosing the Right Increase
Each knitting project comes with unique requirements, and selecting the appropriate increase method can be the key to achieving a polished and professional result. Here are some factors to consider when choosing the best increase method for your work:
- Stitch pattern: Different knitting patterns, such as lace, stockinette stitch, and garter stitch, may call for specific increase techniques that blend seamlessly with the pattern.
- Visibility: Some knitting projects require invisible increases, while others can accommodate more visible methods. Consider the overall aesthetic you want to achieve and select an increase technique accordingly.
- Skill level: If you’re a beginner knitter, you may prefer to start with simpler methods, such as the backward loop increase, before moving on to more advanced techniques like the lifted increases.
- Leaning direction: Certain knitting patterns may require increases that lean in a specific direction. For example, left lifted increase (LLI) and right lifted increase (RLI) create different effects, so choose the one that best suits your pattern.
Mastering the Art of Stitch Increases: Practice Makes Perfect
As with all knitting techniques, practice is essential for perfecting your stitch increases. Be sure to experiment with different methods on small swatches before incorporating them into your knitting projects.
This will help you build confidence and ensure your increases blend seamlessly with your knitting pattern.
Exploring Different Yarns and Needles for Unique Effects
Don’t be afraid to play with different yarn types and needle sizes to achieve a variety of interesting knitted shapes and textures. Combining various increase techniques with unique yarns can lead to stunning and unexpected results in your finished knitted pieces.
Troubleshooting Common Knitting Increase Problems
While working on your knitting projects, you may encounter some challenges with your stitch increases. Here are some tips for addressing common issues:
- Uneven tension: Ensure that your working yarn tension remains consistent throughout your project, as uneven tension can lead to unsightly gaps or puckering around your increases.
- Accidental holes: Some increase methods, such as the backward loop increase, may create small holes in your work. If this is undesirable, opt for an invisible increase method like the lifted increases.
- Incorrect stitch count: Keep track of your stitch count to ensure you’re not adding too many or too few stitches. Regularly counting your stitches can help you spot and correct mistakes before they affect your overall knitting pattern.
- Tight stitches: If your increases are too tight, try using a larger needle size or adjust your tension to create looser stitches. This can help you achieve a more uniform fabric and make it easier to work the increases.
- Uneven spacing: To maintain a consistent appearance in your knitting, ensure that your increases are evenly spaced. This may involve counting rows or using stitch markers to help you track your progress.
- Choosing the right yarn: The type of yarn you use can impact the appearance of your increases. Experiment with different yarns to find the one that best suits your desired outcome and complements your chosen increase method.
Understanding the Role of Increases in Shaping Your Knitted Projects
Knitting increases play a crucial role in shaping your knitted projects. Whether working on a garment, a decorative accessory, or a cozy blanket, increases can help you achieve the desired shape and fit. Understanding how and when to use increases is essential for tackling more complex knitting patterns and expanding your skillset.
Experimenting with Lace Patterns and Increases
Lace patterns often require a combination of increases and decreases to create intricate, openwork designs. Experimenting with different increase methods in lace knitting can yield stunning results and open up possibilities for your knitted creations. As you become more comfortable with increasing stitches, you’ll find it easier to read lace patterns and create delicate, eye-catching projects.
Adapting Increases for Knitting in the Round
When knitting in the round, you must adapt your increase techniques to ensure a smooth, continuous fabric. This may involve using different methods or adjusting the placement of increases to accommodate the circular nature of your work. By mastering increases in circular knitting, you’ll be able to create seamless garments and accessories easily.
Discovering the World of Short Rows and Increases
Short rows are another powerful technique that can benefit from well-executed increases. Combining short rows with carefully placed increases allows you to create shaping and intricate designs in your knitted projects. Learning to incorporate increases into your short row knitting will open up new possibilities for designing custom-fit garments and intricate textures.
Tips for Combining Increases with Cables and Textured Stitches
Cables and textured stitches can add depth and visual interest to your knitting projects. Ensuring that your increases blend seamlessly with the pattern is essential when working with these types of stitches. By selecting the appropriate increase method and carefully placing your increases, you can maintain the integrity of your cables and textures while still achieving the desired shaping.

Maintaining Consistent Stitch Count and Gauge
A consistent stitch count and gauge are essential for ensuring your knitting projects turn out as expected. When working with increases, keeping track of your stitch count and gauge throughout your project is important. This will help you avoid unintentional shaping or sizing issues that can arise from adding or subtracting too many stitches. Regularly measuring your gauge and counting your stitches will help you stay on track and achieve a flawless finished piece.
The Art of Pairing Increases and Decreases for Balanced Projects
While increases add stitches to your work, decreases remove stitches, helping you shape your knitting projects in various ways. Combining increases and decreases effectively is crucial for creating balanced and symmetrical designs. Experiment with different combinations of increase and decrease methods to find the perfect balance for your project and achieve a professional, polished result.
Incorporating Increases into Colorwork and Intarsia Knitting
Colorwork and intarsia knitting techniques often require increases to create intricate patterns and designs. You can create visually stunning, functional, and beautiful pieces by skillfully incorporating increases into your colorwork and intarsia projects. As you become more proficient in knitting increases, you’ll find it easier to navigate the complexities of colorwork and intarsia knitting, broadening your range of creative possibilities.
Using Increases to Create Decorative Edges and Borders
In addition to shaping your knitted projects, increases can also be used to create decorative edges and borders. By incorporating increases into your cast-on or bind-off edges, you can add a touch of flair to your projects, making them truly unique. Experiment with different increase methods and placements to find the perfect decorative edge for your knitting creations.

Mastering Increases for Ambitious Projects: Sweaters, Shawls, and Beyond
As your knitting skills progress, you may tackle more ambitious projects, such as sweaters, shawls, and other intricate garments. Mastering the art of increasing stitches will be vital for the success of these projects. By understanding how to incorporate increases seamlessly into your work, you’ll be well-equipped to create stunning, well-fitted garments that showcase your advanced knitting abilities.
Exploring Increases in Sock Knitting: Heel Turns and Shaping
Sock knitting often involves using increases to create the unique shaping required for a comfortable, well-fitting sock. Mastering increases in sock knitting can greatly improve the quality of your finished product, ensuring that your socks fit snugly and comfortably on the foot. Heel turns, gussets, and toe shaping benefit from the precise placement of increases, allowing you to create functional and stylish socks.
The Benefits of Blocking and Finishing Techniques for Increased Stitches
After you’ve completed your knitting project, incorporating increases, paying attention to blocking and finishing techniques is essential. Blocking helps to even out any irregularities in your knitting, ensuring that your increases blend seamlessly with the rest of your work. Proper finishing techniques, such as weaving in ends and seaming, can also help to create a polished, professional appearance. Taking the time to block and finish your projects will enhance the overall quality of your knitting and showcase your increases in the best possible light.
The Importance of Swatching and Practice for Perfect Increases
Before diving into a new knitting project, creating swatches to practice your chosen increase methods is crucial. Swatching allows you to test how different increases interact with your chosen yarn and stitch pattern, ensuring that you achieve the desired effect in your final project. Swatching also helps you become more familiar with the increased techniques, building muscle memory and increasing your confidence as you tackle more complex patterns.
Boosting Your Knitting Confidence: Sharing and Learning from the Community
As you continue to refine your knitting increase skills, don’t be afraid to share your progress and learn from fellow knitters. Participating in online and in-person knitting groups can provide valuable insights, tips, and encouragement. By engaging with the knitting community, you’ll discover new increase methods, troubleshoot common issues, and gain inspiration for future projects. Embrace the support and camaraderie of the knitting community as you continue to grow and develop your knitting expertise.
Embracing the Joy of Knitting: Expanding Your Skills
Learning how to increase a stitch in knitting is just one of the many skills that can help you unlock the full potential of your knitting abilities. As you explore different knitting patterns and techniques, you’ll find yourself creating beautiful and intricate knitted items that showcase your talents. So grab your needles and yarn, and let your creativity soar.
